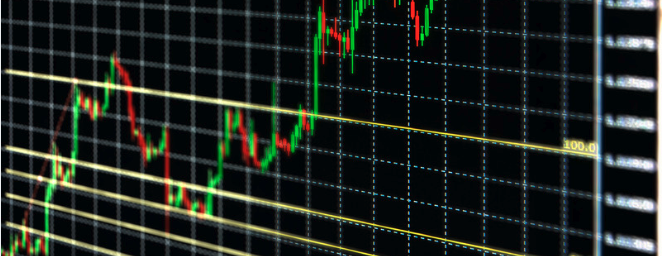
Mastering Fibonacci Levels for Reversion to Mean Trading
Fibonacci levels add a powerful layer to reversion to mean (RTM) trading by highlighting natural retracement and extension points. This post explores how Fibonacci levels can help us identify potential reversion entries, set targets, and manage risk, making them a valuable addition to our RTM strategy.
5 min read


How to Use Fibonacci Levels Effectively in Reversion to Mean Trading
In reversion to mean (RTM) trading, Fibonacci levels offer a structured way to spot entry points, set profit targets, and manage risk. Based on mathematical ratios found in nature, Fibonacci levels reveal hidden retracement and extension points where prices often reverse or stall. By mapping these levels on a chart, we can identify high-probability zones for price reversion.
In this guide, we’ll cover how to use Fibonacci retracement and extension levels in RTM. With these levels, we gain a powerful framework to add precision to our trading, helping us enhance entries, exits, and risk management.
Understanding Fibonacci Levels in Trading
What Are Fibonacci Levels? Fibonacci levels are derived from the Fibonacci sequence—a series of numbers where each number is the sum of the two preceding ones. In trading, Fibonacci levels help us identify natural retracement (pullbacks) and extension (price targets) zones. Common levels include 38.2%, 50%, 61.8%, and 78.6% for retracements, while extensions range from 114% to 161.8%.
How Fibonacci Levels Apply to RTM: In RTM trading, we look for prices to return to an average or mean. Fibonacci retracement levels show us where price is likely to pull back before resuming its trend, making them ideal for identifying reversion entry points. Extension levels, on the other hand, highlight potential profit targets beyond the mean.
Common Fibonacci Levels in RTM: While there are many Fibonacci levels, the most commonly used in RTM are 38.2%, 50%, 61.8%, and 78.6% for retracements and 114% and 127.2% for extensions. These levels provide a structured way to anticipate potential reversion points, making them invaluable in RTM setups.
Using Fibonacci Retracement Levels to Identify Reversion Points
Spotting Retracement Levels After a Price Swing: When a price swing occurs, we draw Fibonacci retracement levels from the swing high to the swing low (or vice versa). This mapping gives us a set of horizontal levels where price is likely to pause or reverse. These retracement levels act as reversion zones where we can look for opportunities to enter trades.
38.2%, 50%, and 61.8% as Key Reversion Levels: The 38.2%, 50%, and 61.8% levels are critical in RTM because they represent points where price often retraces before continuing its trend or reverting to the mean. For example, if price rallies, the 38.2% and 61.8% levels act as high-probability zones for pullbacks, where price might stabilize and revert.
Example of Using Retracement in RTM: Imagine a stock with a recent high and low that creates a clear swing. We draw the Fibonacci retracement from high to low and watch as price pulls back to the 61.8% level. This level is a prime entry point for a reversion to the mean, especially if other indicators confirm the setup.
Tip: Wait for confirmation at these Fibonacci levels, such as a reversal candlestick, before entering. This added confirmation improves entry accuracy and reduces false signals.
Setting Profit Targets with Fibonacci Extensions
How Extensions Help with Target Setting: Fibonacci extensions provide price levels that help us set profit targets in RTM. These extensions show us where price is likely to go if it moves beyond the mean, allowing us to plan exits more strategically. Extensions offer valuable insights, especially when strong reversion moves continue past the mean.
Popular Extension Levels for RTM Targets: In RTM, we focus on the 114%, 127.2%, and 161.8% Fibonacci extensions as target zones. These levels help us set realistic profit points and avoid holding trades too long. When price reverts to the mean, it may push toward these extensions before stalling or reversing.
Example of Using Extensions as Targets: Suppose price reverts to the mean on a 15-minute chart and then moves toward the 127.2% extension level. This level serves as an excellent profit target, capturing the reversion move and allowing us to exit with gains before potential price exhaustion.
Tip: Consider setting an initial target near the mean (100% retracement) and scaling out at Fibonacci extensions. This approach helps secure profits while letting some of the position ride in case of a continued move.
Managing Risk with Fibonacci Levels in RTM
Using Fibonacci Retracements for Stop Placement: Fibonacci retracement levels also provide logical stop-loss points. By placing stops just beyond a retracement level, like the 78.6% level, we give the trade room to move without getting stopped-out by minor fluctuations.
Scaling Stops with Fibonacci Extensions in High Volatility: In volatile markets, consider setting wider stops around extension levels like 127.2% to accommodate larger swings. This placement helps protect the position in high-volatility environments while still managing risk.
Example of Setting Stops Using Fibonacci: In a trade setup where price has retraced to the 61.8% level, placing a stop just beyond the 78.6% level helps us balance protection with the likelihood of staying in the trade. This approach allows for some price fluctuation while reducing the risk of unnecessary stop-outs.
Tip: Adjust your stop placement based on volatility. In calmer markets, stops can be closer to retracement levels, while volatile markets may benefit from stops near extension levels.
Combining Fibonacci with Other RTM Indicators
Using Moving Averages and Fibonacci Together: Combining Fibonacci levels with moving averages, like the 34 EMA, adds an extra layer of confirmation to our RTM trades. When a Fibonacci retracement aligns with a moving average, it strengthens the reversion signal, increasing the likelihood of a successful trade.
Combining Fibonacci with Oscillators for Confirmation: Oscillators like RSI or Stochastic provide additional validation for RTM setups. When price hits a Fibonacci retracement and the oscillator reaches overbought or oversold levels, the reversion signal is more reliable.
Example of Combining Fibonacci with Other Indicators: Imagine price retraces to the 61.8% level, aligning with the 34 EMA and an overbought RSI. This combination provides a high-confidence reversion signal, making it an ideal entry for an RTM trade.
Tip: By layering Fibonacci levels with other indicators, we improve trade quality and increase the likelihood of entering high-probability setups, filtering out weaker signals.
As You Can See
Using Fibonacci levels in RTM trading offers a structured approach to finding entry points, setting profit targets, and managing risk. Retracement levels like 38.2%, 50%, and 61.8% help us identify key reversion zones, while extension levels like 114% and 127.2% guide us on exit points beyond the mean.
Practicing with Fibonacci levels in various markets will give you the confidence to integrate this tool seamlessly into your RTM strategy. By combining Fibonacci levels with moving averages and oscillators, you’ll create a well-rounded approach that enhances both entry accuracy and risk management.
Ready to Add $50 or More to Your Daily Income?
If you are really ready to master reversion to mean trading, head on over to our About RTM page where you'll find all the essential education, information, tips, and tools to perfect this strategy. Don’t miss out—dive into more in-depth content and sharpen your skills ASAP!
Extreme to Mean
Low Risk, High Reward - Reversion Done Right
Join Our Newsletter 📧
© 2024. All rights reserved.
Support@ExtremetoMean.com
Unlock exclusive trading tips, tools, and strategies—sign up for our newsletter and take the first step toward consistent profits!
All content is for educational purposes only and not financial advice. Trading carries risk, including potential loss of capital.
